Sunday, November 9, 2014

OOTD Lazy Sunday

Here's how I dress on a normal basis. Laziness is key ;)
Outfit Details:
H&M Moto Jacket
H&M Muscle Tee
AE Jeggings
Kohl's Necklace
Forever21 Booties

I made a Youtube Video

Hey guys, just figured I'd jump back into the beauty community, and what better way than by making a Favorites/Unfavorites Video?
Enjoy ;)

Products reviewed/mentioned: 
Skin79 BB Cream Orange
Garnier Cleansing Oil
Suave Dry Shampoo Keratin
L'Oreal Volume 24H Mascara
Toppik Hair Building Fibers
H&M Circle Scarf
Benefit They're Real Push Up Liner
Secret Clinical Strength Deodorant 

Wednesday, March 12, 2014

Oh how I wanted to like you: Eucerin Redness Relief


As I mentioned in a previous post my skin hasn't been very happy this Winter. I decided to check out the Eucerin Redness Relief skincare line to see if it would help. The first product I bought was Soothing Night Cream. The pros: it didn't sting when I put it on and the slight greenish color helped with the harsh red look my skin had from washing it. I was pretty pleased with the night cream, it wasn't super amazing but I figured I should try out the whole line.
Walgreens was having a buy 1 get 1 50% off on the line so I purchased Eucerin Redness Relief Soothing Cleanser and Eucerin Redness Relief Daily Perfecting Lotion.
First let's talk about the cleanser: it didn't foam up like other cleansers I had tried, and it was actually harder to wash off then other cleansers I had ever used before. Also, I wear make-up so it's important for my cleanser to remove my make-up as well. Sadly this cleanser didn't do much for taking off my make-up, and I ended up breaking out for the 2 weeks I was using it.
The daily lotion was the product I was most excited to try. It has green color neutralizers which are supposed to relieve the redness right away. Sadly the lotion wasn't very hydrating, it had a strange grainy feeling to the consistency which was also a little abnormal from other lotions I've used. I continued to use it and enjoyed the fact that I could lounge around the house without make-up on and not worry about my face looking bright red. The downside again was I couldn't use it with make-up. The few times that I tried, I'd put it on and then apply foundation on top it would dissolve the foundation in spots around my face.
I ended up discontinuing the use of these products after 2 weeks so I can't say anything about the claim that these products "improve the condition of visibly red skin in 4 weeks".
Have you tried these products before and had better luck with them? Know of any other products I can try to help with the redness of my skin? Leave a comment below :)

Friday, March 7, 2014

Garnier Oil Cleanser Review

So first things first, I LOVE THIS STUFF.
Don't let the "dry skin" part persuade you against buying this product if you have combination/oily skin.
Ok, now onto all of the details:
The story begins on a normal day visiting my local Walgreens store 2 weeks ago. I had something to return that didn't work for my skin and decided to browse the other face cleansers just in case. (Prior to trying this cleanser my skin had gone out of whack and decided to burn and turn red every time I washed my face, so I was looking for something gentler). I saw a new display for Garnier and noticed an oil cleanser which excited me immensely. I've tried other oil cleansers in the past, but they're usually over $20 and I've never been able to buy one at a drugstore which I was always disappointed with. I was instantly sold at the $7.99 price tag, went to the cash register and was surprised with a dollar off coupon, meaning this stuff only cost me $6.99!
Here's my thoughts:
It works amazingly at removing my make-up and cleansing my face before bed. Before this I was using a cleanser, homemade oil make-up remover, and then a cleansing cloth to remove the oil that I used to take off my eye make-up. With the Garnier Nourishing Cleansing Oil all I have to do is apply it to my dry skin, rub it all over, then rinse, and magically all of my make-up is removed without any other steps! Also, unlike other cleansing oils I've tried in the past, it leaves a tiny bit of oil on the skin afterwards. At first I was skeptical about this since I have combination, acne prone skin to begin with but it actually worked in my benefit. Now, instead of using a night cream to keep my winter skin from feeling red, dry and sore at night I just wash my face with this, let the tiny bit of oiliness soak in and I'm done with my night time skin care! Also, I haven't had any breakouts during the 2 weeks I've been using this product.
The only downside is the scent. It's a very strong floraly scent which I'm not a huge fan of but I'll deal with it since this is the only cleanser I've been able to use this Winter that hasn't turned my face into a burning red mess.

Saturday, May 25, 2013

My Crazy Colored Hair :)

The first color I did was purple, it was kind of grey toned, but I still liked it
Color used: Color Craze Purple Passion + Conditioner
Next color was pink, it came out more vibrant than I wanted but it was still fun
Color used: Splat Pink Fetish + Conditioner
I added some white extensions for fun
Then I decided to do blue
Color used: Splat Blue Envy
The blue faded on my natural hair to purple, so I did a bleach wash on my extensions and it came out like this:
I then decided to add some pastel blue (Splat Blue Envy + conditioner)
I was tired of the blue/purple look so I switched to turquoise
Color used: Splat Aqua Rush + Conditioner
It faded to this after about a month, and I kept it this color for a few months
The turquoise basically faded all the way back to blonde so I dyed it super pale pink/ditched the extensions
Color used: Color Jamz Party Time Pink + Conditioner
I decided I wanted a more vibrant pink after about a week so I switched back to Splat
Color Used: Splat Pink Fetish + Conditioner
Once this pink fades I'm going to do pastel blue :)

Which color was your favorite?


Tuesday, May 14, 2013

My Everyday Makeup Products


Face
Foundation: CoverGirl Outlast Stay Fabulous 3 in 1 Foundation 805 (applied w/ Beauty Blender)
Powder: Rimmel Stay Matte Translucent (applied w/ Real Techniques Buffing Brush)
Contour: ELF Contouring Bronzer (applied w/ Real Techniques Contour Brush)
Cheeks: NYC Smooth Skin Bronzing Face Powder Sunny (applied w/ Real Techniques Contour Brush)
Highlight: Essence Breaking Dawn Shimmer Powder (applied w/ ELF Blush Brush)
Eyes
Primer: ELF Eyelid Primer
Eyeshadow: Profusion Sultry & Neutrals 10 Eyeshadow Pallet (applied w/ ELF Mineral Eyeshadow Brush)
Eyeliner: Essence Gel Liner (applied w/ ELF Essential Concealer Brush)
Mascara: L'Oreal Telescopic Shocking Extensions Mascara, Maybelline Volum' Express The Colossal, Benefit They're Real
Eyebrows: NYC Brow Pencil Taupe
Lips
Lipstick: MAC Myth


Thanks for reading!
xo

Monday, March 25, 2013

Spring Breakers Inspired Pastel Pink Hair Tutorial Under $10

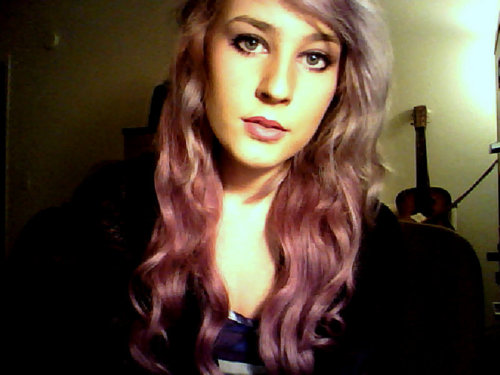
It's currently the first day of Spring Break for myself  and the movie Spring Breakers came out this weekend. Sadly all my friends have been busy so I decided to stay home and have some fun by myself (AKA binge on food and dye my hair). I decided after some deliberation that I'd try to recreate Cotty's look played by Rachel Korine. She has light pink hair with some dark roots, so I figured it would work in my favor since I wouldn't have to bleach my grow out in the process.

What you will need:

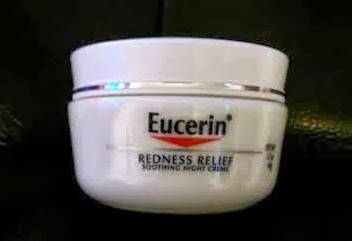
1. Hair dye from Sally's Beauty Supply in the color Party Time Pink by Color Jamz $6
2. White conditioner (I chose Suave coconut because I like the smell and it's .97)
3. An empty container
4. 4 Har ties
5. Shower cap OR plastic bag (Dollar tree sells shower caps in packs of 10, if you don't want to spend $1 tie a plastic bag around your hair while it's developing)
6. Optional: Gloves (I'm only saying optional since I didn't use any and my hands aren't crazy colored as I'm typing this. On a normal basis, or with darker colors I would recommend investing in some rubber gloves.)
7. A dark shirt to wear while dying your hair in case any hair dye comes off on it, it won't stain it.
8. Clean hair. Preferably blonde or light colored hair, darker hair will have very slight color change.

The process:
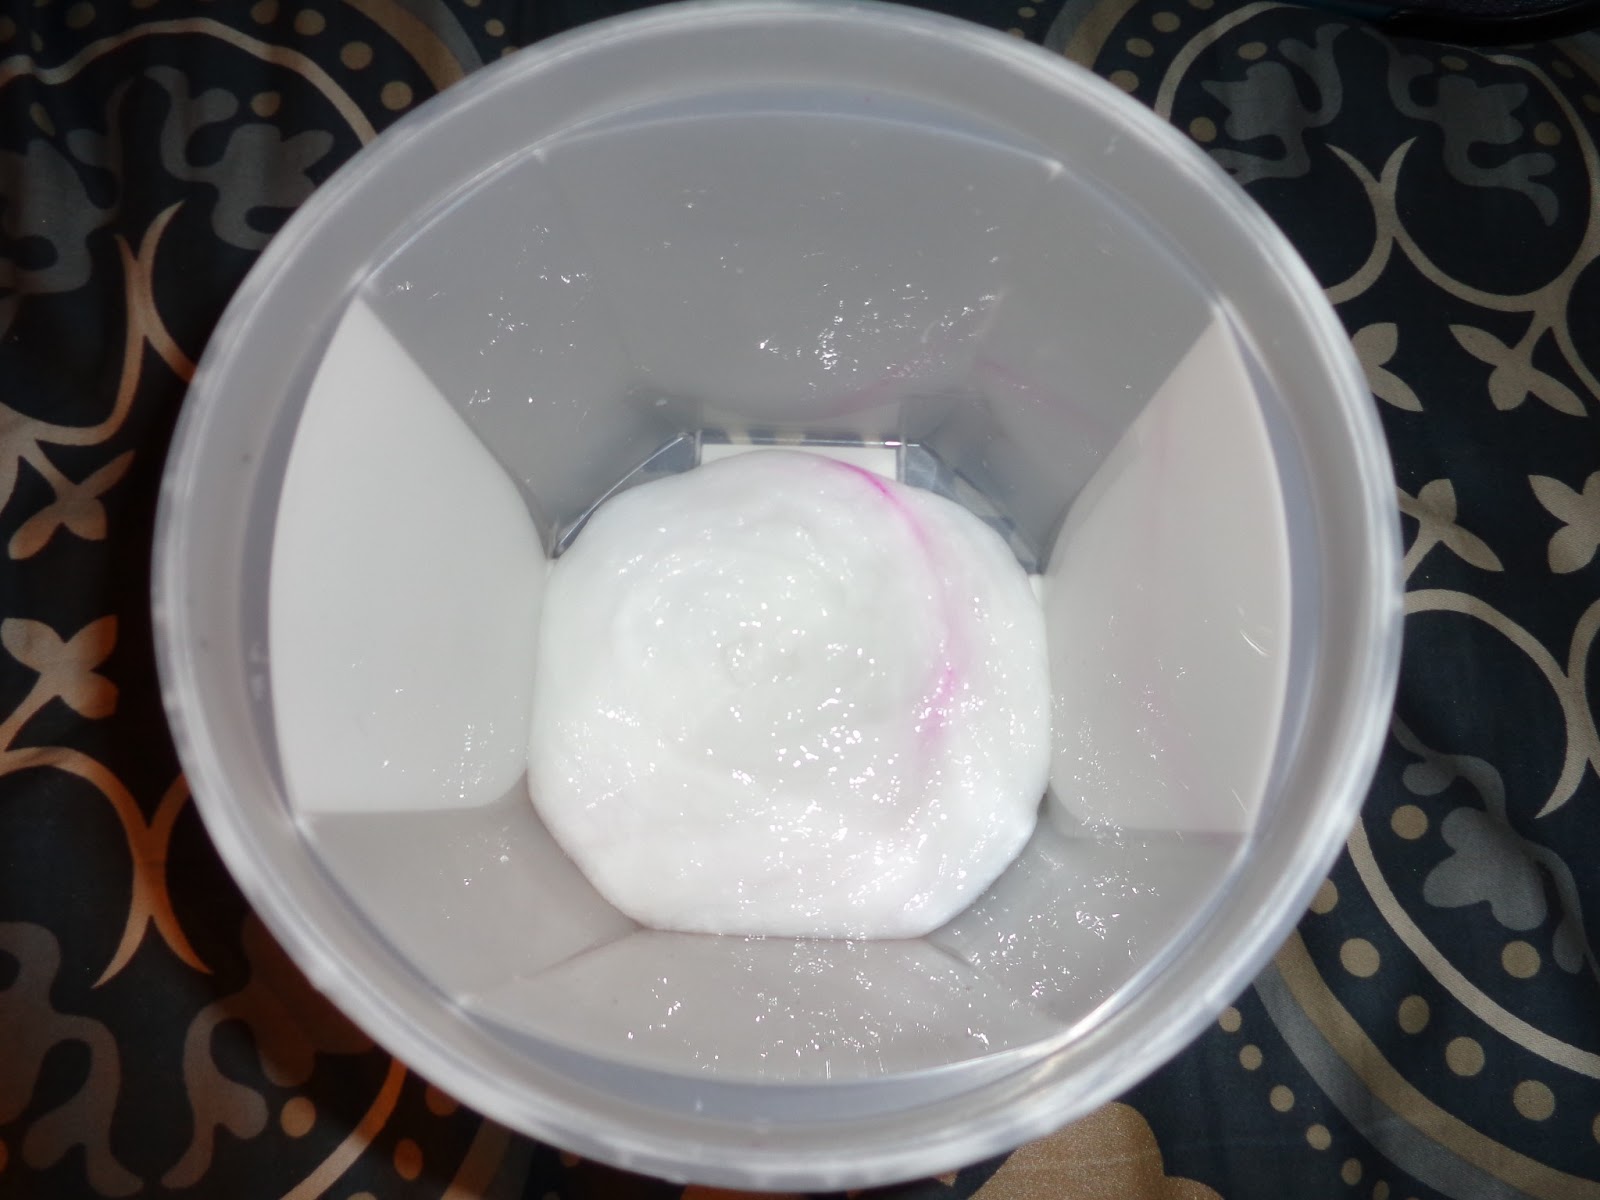
1. In an empty container squirt out a quarter size amount of hair dye.

2. Next, pour conditioner over the hair dye (about an inch-2 inches of conditioner should work), mix until you get a medium to pale pink color.


3. Separate hair into 4 equal parts, secure each with a hair tie.
4. Place hair dye mixture onto one of the four parts of hair, making sure to saturate from root to tip before moving on to the next section.
5. Repeat step 4 until all hair is covered.
6. Take some more hair dye solution and work all over your hair just to make sure there isn't any missing areas.
7. Cover with a shower cap or plastic bag.
8. Wait 45 minutes. Watch an episode on Hulu, the time will go by faster. ;)
9. Wash out in the shower until the water is running almost clear. Since this isn't a permanent dye the water won't run clear.


Some helpful hints:
1. If this is your first time place newspaper or towels all over the surrounding surfaces around you. Depending on the brand, these types of dyes can stain things forever, or be really hard to get off once dried. (I haven't had this problem with diluted Color Jamz, so they're really good for first timers)
2. Speaking of stains, make sure to wash off any dye that gets on your skin right away, unless you want splotches of discoloration on your face, neck, and ears.
3. Don't wash your hair everyday after dying it. Invest in a dry shampoo. The color fades pretty quickly since it's been diluted with conditioner. (I love Suave's dry shampoos, they're inexpensive and work amazingly)
4. If you hate the color or wish it was lighter wash your hair with a cleansing shampoo, it will help the color fade a lot quicker.

This is how my hair came out, I think next time I do it I'll add in two quarter size amounts of pink hair dye to make it a tad bit darker, and make it last longer.
Makeup:
Foundation-Covergirl Outlast Stay Fabulous 3 in 1 Foundation-805 Ivory
Face Powder-Rimmel Stay Matte-Translucent
Eyeshadow-LA Colors Trio-Iris
Eyeliner-Elf Liquid Liner
Mascara-Benefit They're Real & L'Oreal Telescopic Shocking Extensions
Blush-Elf Fuscia Fusion
Highlight-Elf Baked Blush-Pinktastic
Lipstick-MAC Viva Glam Nicki 2

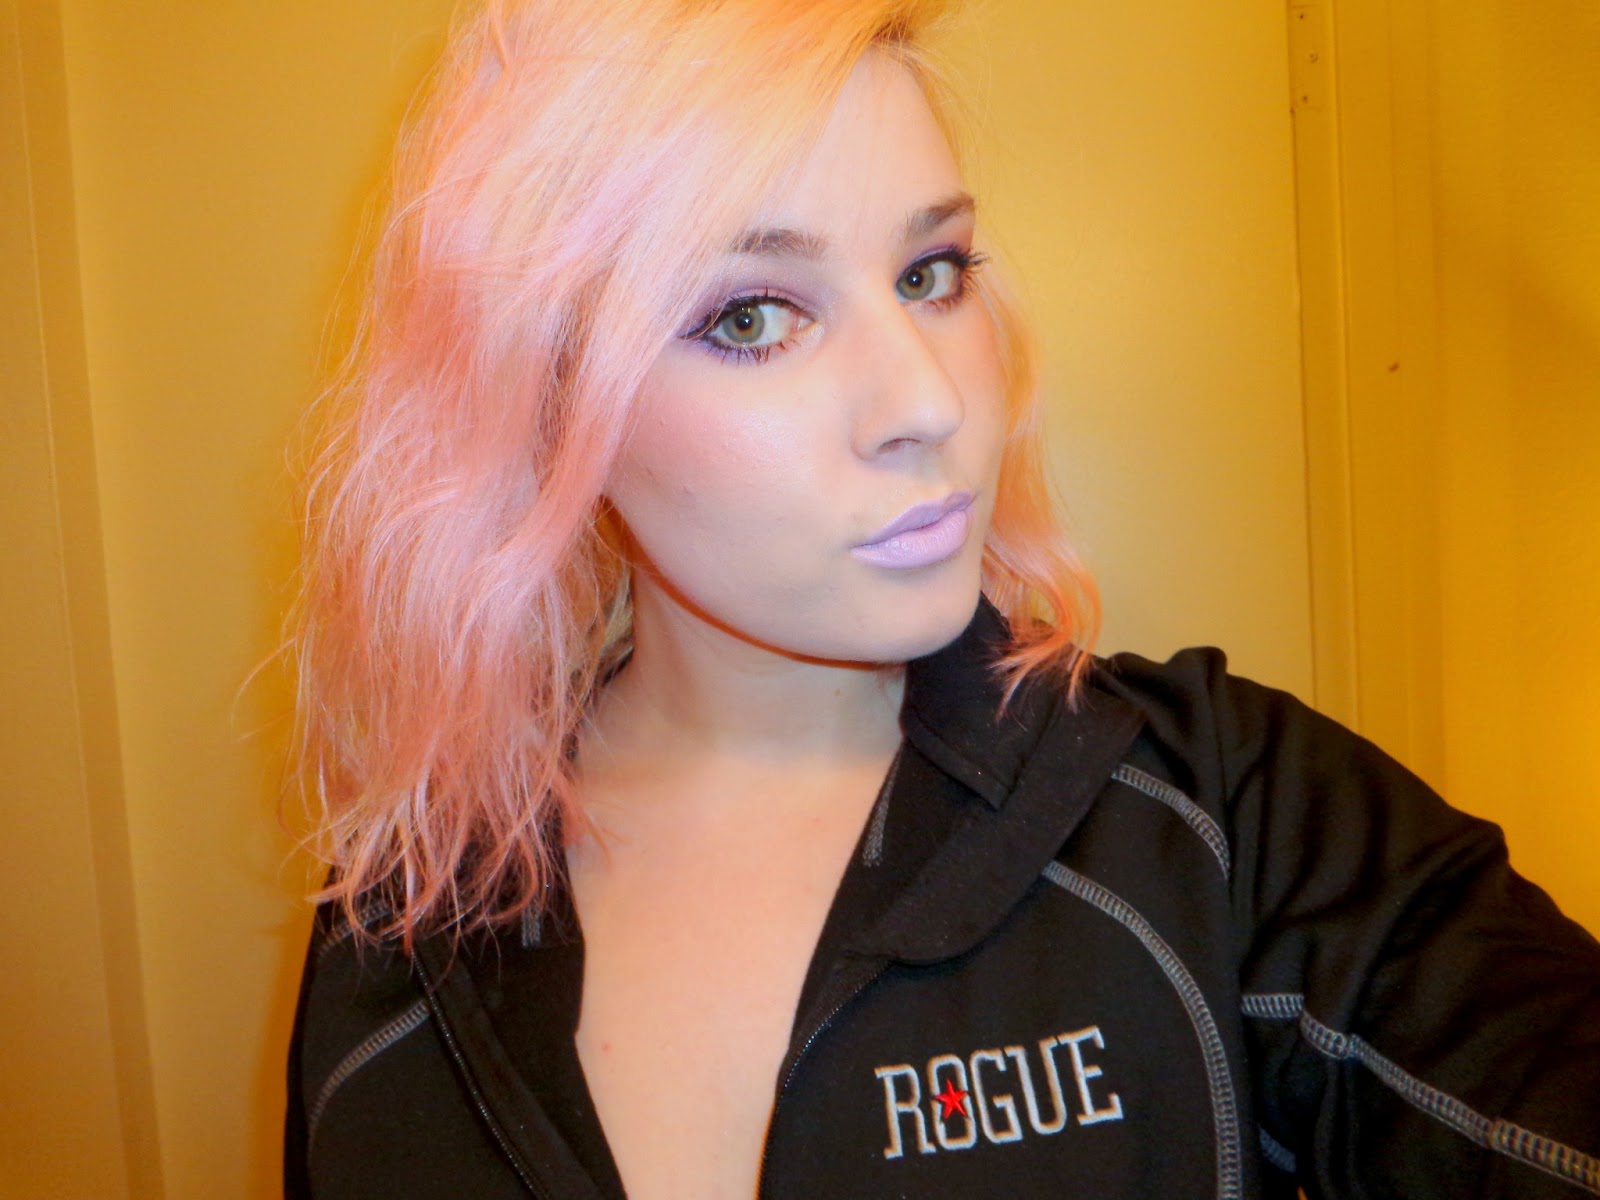
UPDATE: Here's my hair after washing it with shampoo and conditioner once. Slightly lighter, but still pastel pink. If you want a dye that will last longer than Color Jamz I recommend Splat which you can purchase at Walgreens or Walmart for $8. In my experience Splat colors have lasted 3 months or longer whereas diluted Color Jamz last 3 washes.

Happy Spring Break! And if you try this out feel free to send me a picture of the results! :)